
In the world of e-commerce, having a strong email marketing strategy is crucial for the success of your online business. One effective way to grow your email list is by using a pop-up form on your website. Shopify, one of the most popular e-commerce platforms, makes adding an email pop-up tool like Tada to your store incredibly easy.
In this guide, we’ll walk you through the step-by-step process of how to add email pop up on Shopify store, so you can start collecting email addresses and growing your business today.
Whether you’re new to Shopify or a seasoned pro, this guide will make the process as simple as possible. So, let’s start.
Table of Contents
How to Create a Newsletter Popup for Your Shopify Store?
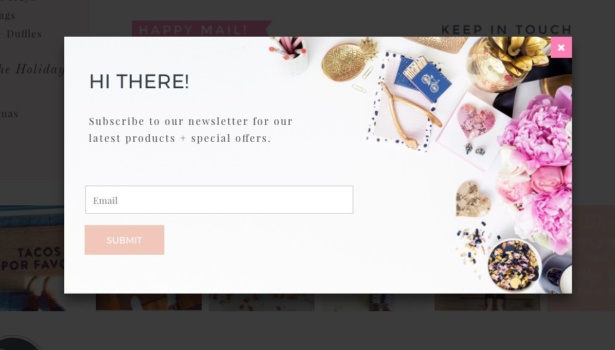
As a Shopify store owner, you want to keep your customers updated about your latest products, deals, and promotions. A newsletter popup is a great way to capture the email addresses of your visitors and keep them engaged with your brand.
Let’s discuss the step-by-step process of creating a newsletter popup for your Shopify store.
1. Install an App
The first step is installing an app to help you create a newsletter popup. There are many apps available in the Shopify App Store that can help you create a popup. Some popular options are:
- Tada
- Privy
- OptinMonster
- WisePops
- Sumo
- JustUno
Choose an app that suits your requirements and install it.
2. Create a Campaign
Once you have installed the app, the next step is to create a campaign. A campaign is a set of rules that dictate when and how your newsletter popup will appear. To create a campaign, follow these steps:
- Log in to your app and select the “Create Campaign” option
- Choose the type of campaign you want to create, such as a popup or a slide-in
- Choose the design and layout of your popup
- Customize the content of your popup, such as the headline and the call-to-action button
- Set the triggers for your popup, such as exit intent or time delay
- Set the targeting options for your popup, such as the pages where it should appear and the devices it should appear on
3. Integrate with Shopify
After you have created your campaign, the next step is to integrate it with your Shopify store. To integrate the app with Shopify, follow these steps:
- Log in to your Shopify store and navigate to the “Apps” section
- Select the app you installed in Step 1
- Click the “Connect” button and follow the on-screen instructions to connect the app to your Shopify store
4. Test Your Email Sign up Pop up
Before you make your popup live, it’s important to test it to ensure everything works correctly. To test your popup, follow these steps:
- Navigate to the page where your popup should appear
- Trigger the popup according to the rules you set in Step 2
- Check that the popup is displaying correctly and the call-to-action button is working
- Enter a test email address and check that you receive a confirmation email
5. Make Your Popup Live
After you have tested your popup, the final step is to make it live. To make your popup live, follow these steps:
- Navigate to the app dashboard and select the campaign you want to make live
- Turn on the toggle switch to activate the campaign
- Test the popup one last time to make sure everything is working correctly
Following the above steps will successfully create a newsletter popup for your Shopify store.
How to Boost Your Email Marketing by Integrate Your Newsletter Pop-Up with Shopify Customer List?
Here’s a step-by-step guide to boost your email marketing by integrating your newsletter popup with your Shopify customer list:
1. Choose an Email Marketing Service Provider
The first step is choosing an email marketing service provider integrating with Shopify. Some popular options include Mailchimp, Klaviyo, and Omnisend.
2. Install the Email Marketing Service Provider App on Shopify
Once you’ve chosen your email marketing service provider, you must install their app on your Shopify store. This will allow you to connect your email marketing service provider to your Shopify customer list.
3. Set Up Your Newsletter Email Pop Up
Next, you’ll need to set up your newsletter popup. This can be done using the email marketing service provider’s popup builder tool. Be sure to customize your popup to match your brand and offer an incentive for customers to sign up, such as a discount code.
4. Connect Your Newsletter Popup to Your Email Marketing Service Provider
Once your newsletter popup is set up, connect it to your email marketing service provider. This can usually be done by copying and pasting a code snippet from the email marketing service provider into your Shopify store’s theme editor.
5. Enable the Customer Opt-In Checkbox
Finally, you’ll need to enable the customer opt-in checkbox. This allows customers to choose whether or not they want to be added to your email list when they make a purchase. Ensure the checkbox is pre-checked to ensure customers who don’t uncheck it are automatically added to your email list.
You may also like: Email marketing apps
Can Your Shopify Pop-Up Drive Sales?
Measuring the success of your newsletter pop-up is critical to determining whether it’s driving sales. Here are some metrics to consider:
1. Conversion Rate
Conversion rate is a key metric to measure the success of your newsletter pop-up. If visitors sign up for your newsletter, you know they’re interested in what you offer. Track this metric over time to gauge how well the pop-up performs and make necessary adjustments. Aim for a healthy conversion rate of 2-4%. This way, you’ll be able to maximize the effectiveness of your email marketing campaigns and drive more sales.
2. Open Rate
Open rate is an important metric for measuring the quality of your newsletter list. If many subscribers open your emails, you know they’re actively engaging with your content. The average open rate for e-commerce emails is around 15-25%.
Monitor this metric over time and adjust your strategy to maximize ROI from email marketing campaigns. Pay attention to subscriber engagement data such as email opens, clicks, social shares, etc., and make improvements based on those insights
3. Click-Through Rate (CTR)
Click-through rate (CTR) is a key metric for email marketing campaigns. If your subscribers click on links in your emails, this is a good sign that your content resonates with them. An average CTR for e-commerce emails is around 2-5%.
Keep track of this metric over time and make necessary adjustments according to the results. Make sure to use descriptive and eye-catching link titles, as well as interesting visuals, to increase the CTR of your emails.
4. Revenue Generated
Revenue generated is one of the most important indicators of success in email marketing. Monitor this metric over time to gauge the ROI from your newsletter pop-up. If you can generate significant revenue, that’s an encouraging sign that your pop-up provides tangible results for your e-commerce business.
Pay attention to email stats such as open rate, click-through rate, and social shares to adjust your strategy accordingly and maximize profits from newsletter campaigns.
Customize your Popup and Add Your Gamification
Customizing your newsletter pop-up and adding gamification elements can increase engagement and make the sign-up process more fun for your customers. Here are some ideas to consider:
1. Offer a Discount
Offering discounts is the perfect way to engage customers and increase sign-ups for your e-mail list. Entice customers with exclusive savings opportunities just for signing up! Even better, giving away discounts adds a playful element to the process – they can watch their discount pile up as they provide more information.
Be sure your pop-up clearly outlines how much money they can save by signing up on your email list. Let your customers know that this deal is only available through sign-up – give them a reason to join now!
2. Add a Progress Bar
Adding a progress bar to your email list sign-up window makes the process more engaging! Customers will feel rewarded as they move through each step and watch the progress bar fill up. Make sure to state what information each part of the bar represents clearly.
This will help keep customers moving further into the process and yield better results. Depending on how far they’ve progressed in filling out their information, you could also have milestones in place, such as additional discounts or special deals. Real-time feedback creates an enjoyable experience that customers will come back to time and again!
3. Use Interactive Elements
Adding interactive elements like quizzes, polls, or games can make the sign-up process more engaging and fun for your customers.
4. Personalize the Pop Up
Use personalization to make your pop-up more relevant to each customer. For example, you could use their name or location in the messaging.
5. A/B Test Different Elements
Test different pop-up elements, such as the messaging, color scheme, or timing, to see what works best for your audience. Use the data to optimize your pop-up for maximum effectiveness.
Final Thoughts
Adding an email pop-up to your Shopify store can effectively grow your email list and boost sales. By choosing an email pop-up app, creating a custom pop-up, and following best practices, you can create a pop-up that resonates with your audience and encourages them to subscribe.
Also read: Best spin to win pop up apps